Showing posts with label Tim Holtz. Show all posts

Saturday, December 24, 2011

12 Days of Christmas - Day 12

Finally! Day 12! I did it! I was a little uncertain whether I'd get through all of this and be able to post before Christmas but I did! (Luckily, hubby has popped out to pick up some Indian food for dinner, so I'm able to squeeze this in.).

Tim's tag from Day 12:


Very pretty colours. Maybe I could do without the creepy doll.

For my card, I kept a few of the techniques Tim used. For example, he had a background on the tag before he put the tissue paper on.  I did this:


Now, if I were doing this card again, I wouldn't bother with this step because it didn't really show up in the end.  I didn't have the Tim tissue paper, so I thought I would just stamp my own. I had to experiment a bit, because the distress ink (on the left below) didn't stay crisp at all, so I used the versafine instead (on the right below).  Much better. The stamp was in reverse, so I used the back of the tissue paper for the card so it would look right way around.  Both sides look exactly the same, for the record.


Here I finished off the card with some drippy goo punched foil tape along the top, and a few snowflakes, painted white with blue stickles rubbed over them. Whew!


I'll be back soon to post a couple of other projects I worked on for Christmas.

Friday, December 23, 2011

12 Days of Christmas - Day 11

Day 11 already! What?!


Actually, I've REALLY been looking forward to making this card.  The shrinky dink in utee technique that Tim Holtz shares in his blog is so cool. The shapes are almost alive, squirming in the utee. You really have to check it out.

I don't have too much to share for this card, as I really stuck to the techniques that Tim demonstrated.


Look how nice these little shrinky dinks are...


... and so much fun to colour!


Just wanted to also show you the card I keep with my alcohol inks so that I can see what the colours really look like. Sometimes it's hard to tell from the bottle.

 
That's it for now!

12 Days of Christmas - Day 10

Well, I finished this card a couple of days ago, and with all the running around getting stuff ready for Christmas, I'm just now getting around to posting.  I had another project I'm going to share... but I'll save that for after all the 12 cards are done!

Here's tag #10:


The ornaments are really cool. But, do you think I could find ANY packing tape? Nooooo. So, again, improvisation was required.


I used my Christmas text stamp for the background. The bottom quarter, the text is upside down. I wonder whether the recipient will notice. :)  I inked the edged with Corduroy Brown distress ink.


I had a leftover bit of greenery from an earlier card, and stuck this on with some glossy accents on top.


And since I had no packaging tape, I just picked a few cute shapes to adhere to the backs of these charms.


I really liked the Santa, but he's just a LITTLE too chubby to fit on the charm. Too bad, cuz he's so cute. So, I grabbed the sticker from the Echo Park set instead and added it to the card to get my fix. (The Echo Park paper is really colourful. One of my favourite brands right now.)

Thursday, December 15, 2011

12 Days of Christmas - Day 9

Here's Tag 9:


The technique Tim was demonstrating here was that one can stamp in one colour, clear emboss it, and then colour overtop and the embossed area would resist. I don't have any cool, bold background stamps, so went for something a bit more serene.


I stamped the trees and snow first (snow was just a speckled stamp, stamped with versamark ink), then clear embossed it.  Then I picked 4 bluish distress inks and stamped in layers.  I think I would have liked it a bit better if the trees popped a bit more, but it's alright.  It does make me long for a white Christmas, but we're not expecting that this year.

Wednesday, December 14, 2011

12 Days of Christmas - Day 8

On Day 8, Tim went full on steampunk:


And this is the style that I think is typical Tim. It's not typical Rona though, and doesn't scream Christmas card to me. I still love the way it looks, and I knew I could pull a couple of things from it.

First, in his technique, he showed how one can stamp with acrylic paint, and then distress ink afterwards and the stamped image would resist the ink. I gave it a go with a Hero Arts stamp I've had for a while and wanted to try. Then, I added a rub on.  Ended up nice, simple, and clean.

But, I needed to "Tim it up" a bit... so I pulled out the gears (and my Cameo :) ). I used the Cameo to cut out a bunch of gears in green. In the Studio, I welded a bunch together in a wreath formation. I inked the edges of them to add some dimension.  A few, I sprayed with Perfect Pearls to get some shimmer.    


So, when I was spraying with the Pearl, I noticed that the background looked pretty cool. My daughter said they looked like snowflakes (Tim, you can use this idea if you like :) ). So, I added this to the card for background. I had to iron it to flatten it out again afterwards. 


I punched a couple of gears out of acrylic to use as stenciling, and then added some alcohol ink to green them up. I like how the droplets of pearls are still there.


Then, I stole Tim's idea and coloured some pearls...


Finally, I assembled my card.  The "wreath" is on the bottom, and a few loose gears are added on top with foam tape.  The acrylic gears are along the edges acting like gears. I was trying to come up with some kind of pun on gears to put inside, but "give 'em the gears" didn't sound very festive, so I went with "Merry Christmas" instead. LOL.

Sunday, December 11, 2011

12 Days of Christmas - Day 7

Day 7 brings us this:


I bought some of that Kraft Glassine earlier in the year thinking, hey, that's cool, but having no idea what to do with it. Seems I wasn't the only one, so for this tag, Tim made a great video on how to work with the stuff, including various ways to colour it, distress it, etc etc.  Here's the card I made using the kraft glassine for the holly:


I did mine a little different as I prefer the crisp white look to the brown distressed, and, you know, I need some glitter. :)   Glitter Ritz on the Sookwang tape is one of my favourite types of sparkle because it's super sparkly and doesn't "shed" too much. If you've used loose glitter lately, you know what I mean.

Initially, I cut out a flourish of grungeboard, then a flourish of sticky tape, then tried to stick the two together. Seriously? What was I thinking???  The light went on and I tried it again by cutting the grungeboard with the tape on top. MUCH better.


Then, I sprinkled on some glitter and burnished it on with my finger. The burnishing helps it adhere, plus makes it more sparkly (if that's even POSSIBLE). It ends up feeling super soft (like velvet... hence the name "burnished velvet").


I cut "JOY" with my Cameo 2x. On the background piece I stuck some more Sookwang tape, and then layered the detail cut on top. Glitter was adhered to the open sticky area.


Put it all together, and what do you get? Glittery goodness, that's what!


Thanks for looking!

Friday, December 9, 2011

12 Days of Christmas - Day 6

Here's the tag from Day 6:


As I was browsing the tags that others had posted, I found one that I really liked, and drew from that more than Tim's. I clicked on the link and found Piia, who is a very talented crafter in Finland. She gave me permission to post her tag, too.  Click on it to pop over to her blog and see some more beautiful work.


So, now feeling very inspired, I started mine.  Still metal and embossed, but a copy of a copy often is very different than the original. :)


I used alcohol ink and stamped a metal-tape-covered piece of cardstock in a patchwork patten. This was done BEFORE embossing.  Then, I took an embossing folder and painted the inside of one side with white acrylic paint. When I ran it through my Big Shot, this is the result:


It's hard to see, but the debossed portions are dulled down due to the white paint, allowing the circle rings to pop. Another angle:


So, after yesterday's marathon run of punching little pine branches, I decided to let modern technology do the work and I used my Silhouette Cameo to cut 3 white holly wreathes.


Popped them out and layered them one on top of the other for a nice, full looking wreath. The file had a few loose holly leaves as well, so I stuck those in individually to add further dimension and fill in any empty spots.

To finish off the card, I cut out some holly leaves, embossed them with the wood grain folder, and added some nice big globs of Stickles.

Thursday, December 8, 2011

12 Days of Christmas - Day 5

When I saw this tag, I loved it immediately. To be honest, some I know are not my style, but this one totally is... nice bright colours, a very cool technique, and very Christmassy. And I had all of the essential supplies; let's not forget that!


Here's my version:


I followed along and was able to successfully make the essential background.  I don't have the Ranger Archival Ink, but I do have Versafine Archival Instant Dry Pigment Ink and Memento Fade-Resistant Dye Ink. I tested out both of these and both worked for the technique, but I found that the Versafine worked slightly better.

Anyway, where I deviated: I recently acquired the Martha pine branch punch as I had seen some beautiful cards made with it, and Two Peas are all over it. Saw it at our Walmart... it was reasonably priced and close to my birthday. No other excuses needed. :)

So, I cut a scalloped donut using some Spellbinders dies...


cut what seemed to be a billion little bits of pine branch (different shades of green and added stickles to a few)...


then laid a good amount of my favourite glue...


and started adhering the branches around in a circle.


 Here's how the wreath looked after all of the branches were stuck on:


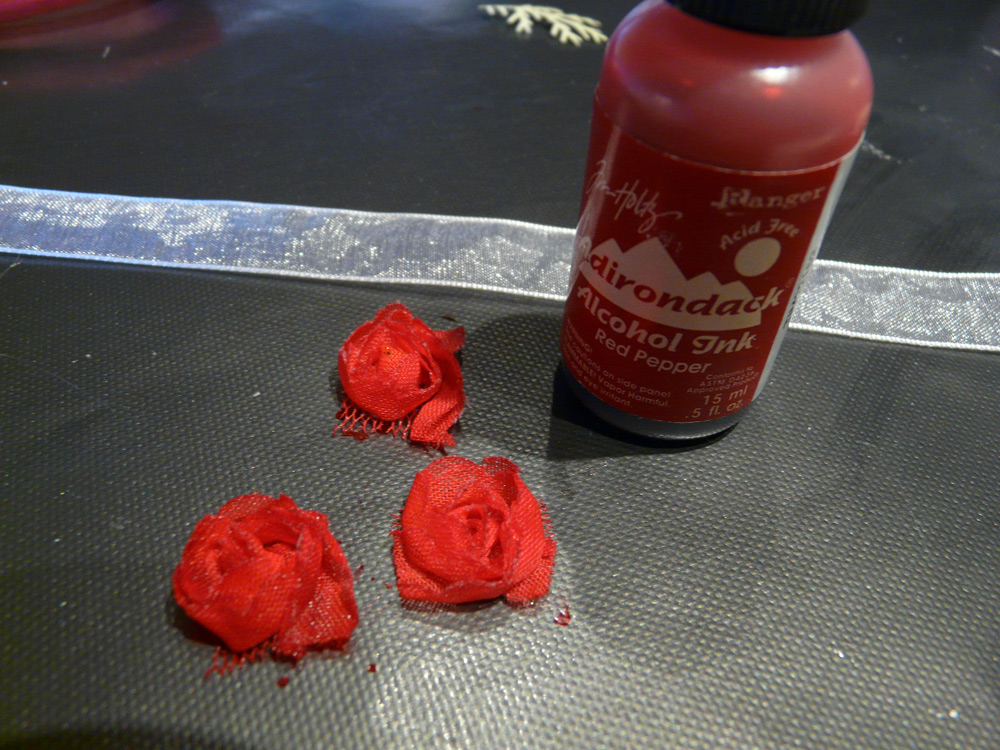
Then, I used some alcohol ink to die some ribbon and ribbon flowers. 


All of the above were assembled and slopped onto the card in some manner resembling a wreath and voila!  Now, off to get this alcohol ink off my fingers!

12 Days of Christmas - Day 4

Ok... let's see if I can catch up a bit! Hubby is away for a few days so maybe he won't notice that there's no clean underwear....

Here's the Day 4 tag from Tim Holtz:


(taaa daaah! I finally figured out how to link the photo to the originating website. Phew!)

I love the glow Tim created in the background on his tag.  Now, again, I had different materials than he did, so I ended up with this:


I don't have the snowman die, so I pulled out the old Seasonal Grunge and found this guy.... he looks kind of dorky, but, hey, a snowman's a snowman!  I don't have distress stains, but I was able to use my ink for a similar effect.  I do LOVE the new Iced Spruce colour for distress ink.  It's for cool colours what Corduroy Brown is for warm colours.

Another favourite thing about this card (and, yes, I make these as Christmas cards because, well honestly, I'm an accountant and need these things to be somewhat practical...) is that I was able to use my Memory Box dies.  They have beautiful intricate designs that I haven't found from any other die manufacturer.  The one's I used on this card are Frostyville
and Frosty Border


Aren't they pretty? They're kind of hard to see on the card, but I did take an angle shot so that you can see it a bit better.


Hopefully I'll be back later today with another card!